

Dash cams have become a must-have device for many commercial fleets.
They help improve the safety of commercial vehicle drivers and fleets and protect drivers and companies against crash-for-cash scams and other potential liabilities when they aren’t at fault.
Installing dash cams, however, can be a struggle for some.
If you recently bought a dash cam (or are thinking of buying one) but aren’t sure how to install the device, then this guide can be for you. We’ll cover four dashboard camera installation methods, as well as the benefits and challenges of each method.
Note: The purpose of this guide is to discuss the common methods for installing dashcams. We recommend that you should also follow the installation instructions provided by your dashcam provider.
Common methods for installing dashcams
There are four conventional dash cam installation methods. Each one has its set of benefits and challenges.
1. How to install a dash cam using a cigarette lighter adapter (CLA)
This method is popular among businesses and consumer-grade dash cams sold by many customer retailers.
It only involves plugging the dash cam’s power cable into a vehicle’s cigarette lighter USB port or socket. This dash cam setup also typically powers the camera only when the engine is on. Depending on your intended dash cam use and vehicle model, this can be an advantage or a drawback.
Modern vehicles typically have cigarette lighter sockets that turn off when the engine isn’t on. On the other hand, most older models have always-on lighter sockets — whether the engines are on or off.
For lighter sockets constantly on, CLA-installed dashcams can keep recording footage and drain the vehicle’s battery.
However, always-on sockets maximize parking mode features, which enable continuous recording even with a shut-off engine. This is useful when safeguarding your vehicles overnight.
Benefits of using a CLA
- Quick, straightforward installation. Installing dash cams through cigarette lighter socket plugs is fast and effortless. It maximizes a quickly accessible vehicle power supply. No expert or shop assistance is necessary for this method.
- High portability. If you need to transfer your CLA-powered dash cams to another vehicle, you can do so quickly and easily. Applying sophisticated hardwiring adjustments is also not necessary.
Challenges of using a CLA
- Rapid battery drain. If your dash cam has parking mode features and you plug it in always-on cigarette lighter sockets, it can rapidly drain your vehicle’s battery. In turn, this prevents you from maximizing your dashcam’s parking mode functionality.
- Less security. CLA installation methods make your dashcam easy to access, requiring no passwords or other security features. It only involves plugging the cable on and off anytime, which means anyone can quickly steal, lose, or misplace the dash cam.
- Unstable connection. If your dash cam power cable does not fit securely into your vehicle’s power socket, the connection can get loose. This causes you to miss any critical recording. Without sufficient incident footage, you might not be able to provide solid evidence or regain any savings dashcams are supposed to help you with.
2. How to set up a dashcam using the hardwire to fuse box method
This solution involves hardwiring the dash cam cable straight into your vehicle’s fuse box.
Connecting your dash cam to the constant fuse in the fuse box allows you to let your camera keep recording even with the vehicle switched off. This enables you to capture any untoward incidents, such as robbery and vandalism, and maximize the parking mode features.
This installation method often entails connecting two wires included in the hardwire kit you bought with the dashcams made for hardwiring.
One wire should attach to a constant fuse that powers your dash cam even with the switched-off engine. The other wire connects to a metal ground bolt that prevents electric shocks.
For most persons, dash cam wiring is technical and hazardous to perform. This method usually requires expert installers to guarantee the system’s safety and functionality.
Benefits of using the fuse box installation method
- Stable connection. With the dash cam directly attached to the vehicle’s fuse box, the connection becomes reliable.
- High security. Because of the direct, hard-to-detach connection, attempting thieves and criminals will struggle with removing the hardwired dash cam.
- Tidiness. Because you keep and attach wires in the fuse box, the setup looks cleaner than the CLA system.
Challenges of using the fuse box installation method
- Complex installation process. Unlike the CLA method, hardwiring takes longer to do and may even require professional assistance. If you don’t know how to wire a dash cam and attempt to do so, you can damage the vehicle, camera, and other parts and lose the equipment’s warranty.
- Additional expenses. Installing dash cams this way can incur additional expenses for buying the kit and an expert’s services.
3. How to wire a dash cam using the OBD port installation method
Installing a dash cam through your vehicle’s onboard diagnostics (OBD) port, you get the same reliable connection from a hardwired method but without its sophisticated process.
A commercial vehicle’s OBD port is quickly accessible, usually across the driver’s seat or under the steering wheel. The installation process typically entails plugging one end of the OBD cable into your dashcam and the other end into the OBD port.
Like the hardwiring method, you can use the parking mode feature and feel secure about your dash cam’s connection.
Benefits of using the ODB port installation method
- Fast, straightforward installation. You don’t need an expert to perform this method. Anyone can do it, which means you can get your dash cam operating within minutes.
- Dash cam security. With this method, you can tuck the cable from your dash cam to the OBD port within the vehicle’s headliner. This makes your dash cam appear like a standard, hard-to-disconnect device and a thief’s less-likely target.
- Cost-effective. The OBT port installation process is quick and easy to do, similar to the CLA method. This leads to more savings and less downtime and shop time to get your camera up and running.
Challenges of using the OBD port installation method
- Less portability. Your dash cam’s secure connection in this method also means fewer options to detach or transfer the device to another vehicle.
4. How to install a dash cam with a battery pack
Installing your camera with battery packs involves plugging the external battery pack into a switched-on power cigarette outlet. This charges your dashcam as you drive.
When you turn off your vehicle’s engine, the battery pack becomes your dash cam’s power source.
Benefits of using a battery pack for installation
- Longer recording time. Battery packs can record footage longer than other installation methods and straight onto your dash cam’s memory card.
- Vehicle battery preservation. Since battery packs serve as a separate power source, they help lengthen your battery life. This eliminates any worry about draining your vehicle’s battery and getting stranded.
- Functionality in an operating vehicle. Battery packs gather power when your cigarette lighter socket is on, enabling it to charge your dash cam once the engine (or lighter socket) is off. It also works better as you drive your vehicle frequently.
- Parking-mode-enabled recording. Battery packs are convenient and easy to install, as explained earlier. And yet, this simple installation does not compromise the quality and schedule of recording. Battery packs can power up parking mode and high-resolution footage recording.
Challenges of using a battery pack for installation
- Short life span. Battery packs generally don’t last long unless they’re large vehicle batteries. They also have shorter durations when you’re driving in a hot climate since they are not as heat-resistant as capacitor models. This limits your capacity to capture footage in times of accidents, robberies, and other critical incidents.
- Untidy. This installation method is not as tidy as the hardwired and OBD port systems. Battery pack installation runs the same way as CLA methods and can require sizable devices placed somewhere in the interior. This adds to the vehicle’s space and potentially becomes an eyesore for drivers.
- Considerable charging time. Battery packs need some time to recharge between parking mode recording activities. Short trips may not completely charge up the devices.
- Additional business expenses. Besides your dash cam, you also need to buy the battery pack itself, increasing your costs.
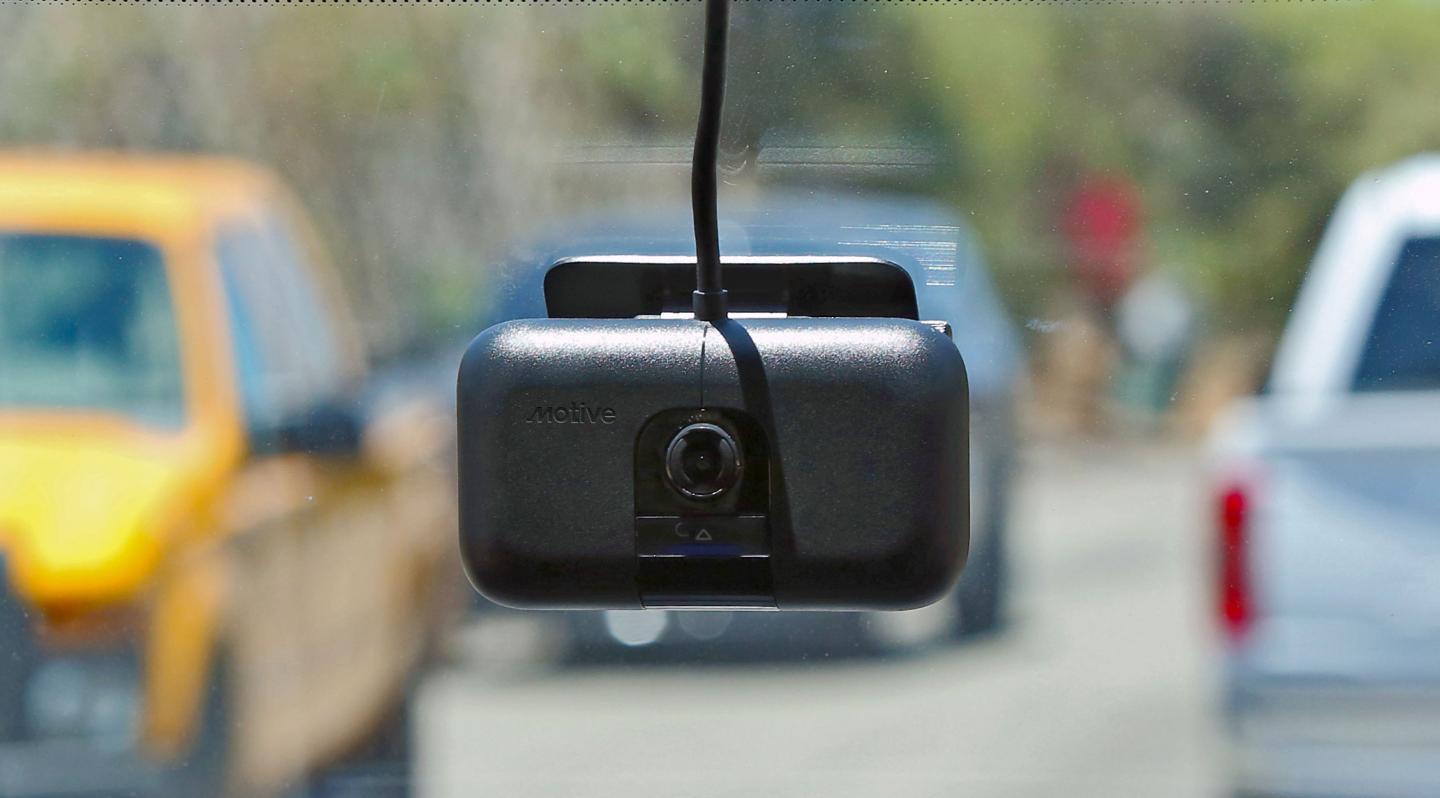
Where is the best place to position a dash cam in a truck?
Dash cams should be discreet, but they should also be in areas where they can perfectly capture your intended road views. They should not block the driver’s perspective either.
You should mount your camera preferably on the windshield’s passenger side and directly behind the rear-view mirror (as close to it as possible). Avoid the windshield’s critical viewing area — which are the spots swept by the wipers. This placement ensures your camera gets excellent views.
Besides getting optimal perspectives, finding the best camera position is also essential for legal reasons. This relates to preventing obstructed views — which dash cams can cause, especially if mounted carelessly.
While using dashcams is federally legal, many states regulate windshield obstructions. However, the general principle you can apply is this: if your dash cam blocks more than a five-inch square on the driver’s side or a seven-inch square on the passenger’s side, that’s not good. For interstate commercial vehicles, 49 CFR 393.60(e) states the federal regulations that address dashcam mounting restrictions.
Remember, positioning your dashcam can vary depending on your state’s restrictions. Here is more information on how to install a dash cam in different jurisdictions with varying obstruction requirements:
For states prohibiting windshield obstructions
Some states disallow attaching dash cams or any other object to your windshield. They enforce this rule to prevent obstructing the driver’s sight of the road.
If you reside in one of these states, don’t install your camera on the windshield. Instead, place it as far from the driver’s road view as possible — ideally behind the rear-view mirror. In addition, make sure that you are following applicable laws.
States that expressly prohibit any windshield obstructions may include:
- Alabama
- Arkansas
- Connecticut
- Delaware
- Florida
- Georgia
- Idaho
- Iowa
- Kansas
- Kentucky
- Louisiana
- Massachusetts
- Michigan
- Mississippi
- Montana
- Nebraska
- New Hampshire
- New Jersey
- Maine
- New Mexico
- New York
- North Dakota
- Ohio
- Oklahoma
- Oregon
- Pennsylvania
- Rhode Island
- South Carolina
- South Dakota
- Tennessee
- Texas
- Virginia
- Washington
- West Virginia
- Wisconsin
- Wyoming.
For jurisdictions with windshield restrictions
On the other hand, some states prohibit mounting dash cams on specific parts of your windshield. Make sure you are following applicable laws. In addition, following are some recommended installation areas that may help you:
- Any spot that does not block the driver’s sight of the road (best if behind the rear-view mirror)
- Passenger side
- If on the driver’s side: place the camera outside the critical vision area on the windshield and as near the rear-view mirror as possible
When picking the best position, experiment with the dash cam’s perspective from different angles. This helps ensure its discreteness and complete, clear view of the road.
States restricting attaching objects on specific parts of your windshield may be:
For states where no restrictions apply
It is important for readers to make sure that they are following applicable laws. If your state has no known legal restrictions on dash cam positions, we recommend following the above-mentioned best practices.
Doing so gives you an optimal road perspective that enhances driver safety rather than posing a hazard.
States with no restrictions on (or no mention of) blocking your vehicle’s windshield may include:
Tips on preparing your cab for setting up a dash cam
Consider these tips when preparing to set up a dash cam on your vehicle:
1. Examine your company’s needs and situation
Before setting up (or even buying) your dash cam, ponder first on your main intentions for obtaining and mounting the device.
Is it primarily to increase road safety, vehicle security at night, prevent financial and insurance losses, or something else? Reflecting on these questions helps you determine your next choices regarding the installation.
Next, examine your current vehicles, resources, and business situation, and ask yourself:
- Which of my vehicles need dash cams the most?
- What kinds of cameras do they need? What are the device’s required installation setups?
- What resources are currently present and lacking that can impact the dashcam installation requirements? (For instance, if the setup needs professional support, do you have technician employees or partners, or will you still need to outsource? Can you allocate some budget for it?)
- What are my vehicles’ models and manufacturing descriptions? Are my dash cam and installation requirements compatible with my vehicle’s systems?
Then, refer back to the discussed installation options and carefully weigh their benefits, disadvantages, and other implications to your business.
You can list your first, second, and even third choices. This widens your selection in case your primary preference does not work out.
2. Know any applicable legal restrictions
States differ in their restrictions regarding the installation of mounted dash cams. These jurisdictions can fall under three categories, as mentioned earlier, and drivers need to be aware of these requirements.
These three categories are:
- States that expressly or vaguely prohibit windshield obstructions
- States indicating only which parts of the windshield can be obstructed
- States that do not restrict or do not indicate prohibitions on blocking windshields
Legalities of windshield obstructions can change anytime for specific states. Consult your local jurisdictions for up-to-date information about the permitted dash cam positions.
3. Take your time
Don’t rush your way into examining your company’s current (or planned) situation, studying the applicable legal restrictions, and deciding on your dash cam installation.
Mounting the device (plus the dashcam itself) can be a substantial investment. So, you need to ensure you can get the right device and set it up properly.
The wrong camera and installation choices can cost you even more money, time, and effort, wasting your initial investment. Conversely, making the proper selection lets you maximize the benefits and resources you put in. Equipping yourself with sufficient knowledge can help you decide correctly.
How to install the Motive Smart Dashcam
If you’re looking for a reliable commercial dash cam that is feature-rich and easy-to-install and set up, the Motive Smart Dashcam is an excellent option.
Powered by artificial intelligence (AI), Motive’s Smart Dashcam automatically detects, analyzes, notifies, and tags unsafe road conditions, high-risk driving behavior, and more. All this increases your visibility into any driving risk, enhances your mentoring programs for drivers, and protects your business from legal fines that are not your mistake.
Installing the Motive Smart Dashcam is so quick and straightforward that you can complete the whole process in under 10 minutes — without a mechanic’s help. You also don’t need to deal with charging batteries, manual footage recording, or SD cards.
For more information on how to set up the Motive Smart Dashcam, check out our Smart Dashcam installation guide with step-by-step instructions.
Once you install the camera, it works instantly. It is tamper-resistant, and footage from a specific date and time is easily downloadable. These features are designed to help you save time, effort, and money — while ensuring you get everything you need to improve driver and fleet safety.
Find out more about the Motive AI Dashcam
Vendors present several dash cam types and installation method options, but they each come with nuances that can quickly outweigh their benefits. With its effortless, cost-efficient, guided installation process, the Motive Smart Dashcam offers your business the best value for your investment.
Learn more about the Motive AI Smart Dashcam or request a free demo today.