A commercial driver’s license (CDL) can put you behind the wheel of a tractor-trailer, a flatbed, or a tanker, among other non-passenger vehicles. Before you hit the road though, you’ll need to complete a CDL pre-trip inspection checklist. By inspecting the commercial vehicle beforehand, you can head out on your route knowing you’ve confirmed major systems and parts are road ready. Recognizing road safety is always a fleet priority. This article provides a comprehensive guide to the CDL pre-trip inspection checklist.

What is a CDL pre-trip inspection checklist?

A CDL pre-trip inspection checklist systemizes the driver’s vehicle inspection to ensure care and consistency. While a pre-trip inspection would be a best practice no matter what, the Federal Motor Carrier Safety Administration (FMCSA) requires these checks for commercial vehicles. Part 396.3 (a) calls on every motor carrier to “systematically inspect, repair, and maintain, or cause to be systematically inspected, repaired, and maintained, all motor vehicles subject to its control.” 

The fleet also has to keep formal records of their vehicle checks. So, drivers typically follow a CDL pre-trip checklist and record their findings in the driver vehicle inspection report, or DVIR, confirming the commercial motor vehicle (CMV) inspection is complete.

A CDL A pre-trip inspection checklist requires drivers to inspect many different parts and system including:

  • Brakes
  • Steering
  • Fuel tank
  • Vehicle lights
  • Tires, wheels, and rims
  • Mirrors
  • Windshield wipers
  • Emergency equipment

Different motor carriers may add their own expectations to the CDL pre-trip checklist. But they would be adding particular items to check, not doing away with the pre-trip inspection. After all, non-compliance with the federal pre-trip inspection requirements can earn hefty fines and lead to the loss of certifications and licenses.

The Class A CDL pre-trip inspection checklist is important enough that drivers testing for their license are expected to do the pre-trip inspection as part of their examination. Inspection requirements can vary by state. There’s also a Class B CDL pre-trip inspection list. 

Why is the CDL pre-trip inspection checklist important?

Compliance isn’t the only reason following the CDL pre-trip inspection checklist is important. The federal requirement is in place, after all, to ensure commercial vehicles on the road are safe to drive. 

With continued investment into critical infrastructure over the last 20 years, the percentage of roads in good condition has climbed since 2000. Yet the United States still has hazardous roads. In fact, “from 2000 to 2020, the share of major roadways in poor condition has remained fairly steady, rising from 11.8% to 13.8% over the course of 20 years.”

This makes keeping commercial vehicles in top shape all the more important to safety and efficiency. A CDL pre-trip checklist helps improve fleet safety by avoiding drivers going out on the road in vehicles that are not fit for duty. Taking a truck out on the road with an unsecured load, damaged brakes, disconnected wiring, or another issue could lead to drivers hurting themselves or somebody else.

Fleet vehicle inspections can also help keep drivers on the road. Identifying issues in advance can help avoid major problems that mean downtime and costly repairs. Plus, if the Department of Transportation (DOT) inspects the vehicle and finds something that the driver missed, they can put that vehicle out of service for longer. DOT violations can also lead to fines and hurt your CSA scores. A decrease in your CSA scores can lose your fleet business and cause your insurance premiums to go up too.

How to perform a CDL pre-trip inspection 

Although there is no specific time limit, a thorough CDL pre-trip inspection usually takes 15 to 30 minutes. This pre-trip starts at the front of the truck, but you can take the steps in this CDL pre-trip checklist and make them your own.

Front of the truck

Verify lights are clean, securely mounted, the right color, and working.
Make sure the truck isn’t leaning.
Confirm there are no leaks under the engine compartment.

Engine compartment

Check critical fluid levels. This includes power steering, coolant, windshield washer fluid, and engine oil.
Inspect reservoirs, tanks, and hoses for any leaks, splits, or cuts.
Ensure the hoses for the water pump, coolant, oil, and power steering are all properly connected and securely mounted.
Check the air compressor is well secured.
Inspect to make sure the belts on the alternator, pumps, and compressor are secure as well. They should have no more than 1/2″ to 3/4″ of play with no cuts or splits.

Front of the truck/tractor

Inspect the steering shaft and gear box to see they’re properly mounted to the frame and that there are no cracks or breaks.
Check gear box hoses for leaks.
Look for excessive play in the steering belt, secure connections.
Check connections and look for leaks on pitman arm, drag link, and upper/lower control arms and tie rod.
Move on to the spring mounts, leaf springs, and U-bolts to confirm they are not cracked or broken and are securely mounted.
Do the same with shock absorber but also look for visible leaks and ensure the rubber bushings don’t have dry rot.
Check the rubber of the airbag.

Brakes

Check the hose, chamber, drum, pads and slack adjuster to confirm secure mountings and no leaks.
Look out also for any breaks, splits, or cuts.
Verify slack adjuster push rod has no more than 1″ of play and is at a 90° angle to the brake chamber.
Check the brake drum has no bluing from excessive heat.
Ensure brake pads have a minimum thickness of 1/4”.

Wheels/tires

Check tires for cuts, bulges, and abrasions on your tires.
Confirm tire tread depth and inflation levels.
Check All lug nuts are accounted for and in good condition.
Ensure valve stem is properly secured and capped.
Look out for unauthorized or illegal welds on wheel rims.
Check tires are properly spaced if your tractor/trailer has duals.
Confirm the hub seal/axle seal is not loose and has no visible leaks.

Rear of truck

Look at the frame to ensure nothing is broken.
Check for unauthorized welds.
Confirm the catwalk and steps are properly mounted and kept clear.
Ensure the drive shaft is free of debris with unbroken and untwisted U-joints.
Verify the exhaust system is secure and look for exterior soot, which could indicate a leak.
Make sure mudflaps are also secured at the right height.

Coupling area

Check that the fifth wheel platform, apron, and kingpin are secure, not cracked, bent, or broken. Look for any unauthorized or illegal welds.
Confirm skid plate is properly greased.
Verify release arm, locking jaw, and slide locking pin are fully locked.
See that mounting bolts are tight and none are missing.
Ensure glad hands have seals in good condition with no signs of rot or leaks.
Secure electric lines with safety latches in place.
Check air connector is secure on both ends without cuts or abrasions.

Trailer

Verify that there are no holes in the trailer’s front, sides, or floor and that all rivets are present.
See that DOT tape is properly secured and not dirty.
Check that all hardware is present on an untwisted, unbroken frame and that cross members are securely mounted with none missing.
Ensure lights are clean, working, and not loose.
Confirm landing gear is raised, securely mounted, with an operational handle.
Check air lines are securely mounted, above ground, with no audible leaks.
Verify tandem slide and release arm are properly mounted and locked.

Truck exterior

Make sure that the truck steps are mounted and secure. 
Ensure the fuel cap is tight and the tank is not leaking.
Demonstrate that the doors latch properly with hinges intact.
Ensure mirrors are unbroken and securely attached.
Check all the lights and reflectors are working too. This means inspecting the running lights, high beams/low beams, turn signals, hazards, brake lights, license plate lights, and reflector tapes.
If driving a hazardous load, ensure you have the proper hazmat placards securely affixed.

Cab check

Check to ensure your seat belt adjusts and latches properly and that there are no rips or frays. Confirm the shifting distance, room for the clutch, and that parking brake is on.
Verify the steering wheel is secure and that the foot pedals are clear of obstruction.
When the vehicle is on, look for the ABS light to come on and off.
Make sure the windshield wipers, heat and defrost, gauges, and horns are working.
Pump the brake pedal several times then apply pressure to the pedal and hold for five seconds to ensure the pedal does not move.
For air brakes, confirm applied pressure, warning lights and buzzers, and valve pop-out are all working.
Look for three reflective triangles, spare fuses or circuit breakers, and a properly charged and rated fire extinguisher with its pin in place.

Common issues found during pre-trip inspections

While completing a CDL pre-trip list, drivers may encounter any of these common problems. This section identifies common issues, how to address them, and how to prevent future problems too. 

Truck is leaning

Using the 3L’s you might see the truck leaning to one side. This could be a suspension problem or indicate low tire pressure.

Fix it by first checking the tire pressure and inflating tires. If that doesn’t address the problem, check the suspension. Driving a vehicle when there is a problem with the suspension, springs, shocks, or struts can cause severe damage to the vehicle.

Broken lights/warning lights

If you detect an exterior light is cracked or broken, fix it before going out on the road. If a light from the on-board diagnostic system comes on during inspection, e.g., “check engine” or “service engine soon,” address that warning as you’ll fail a roadside inspection if that light comes on. 

Gas cap missing

Damaged or missing gas caps are a common reason for failed inspections on the road. Don’t set out on your route without replacing the gas cap.

Worn tire tread

Unacceptable or worn tire treads or knots or bulges in tires can also lead to failed roadside inspections. Don’t risk going on your route with substandard tires.

How to prevent future CDL pre-trip list problems

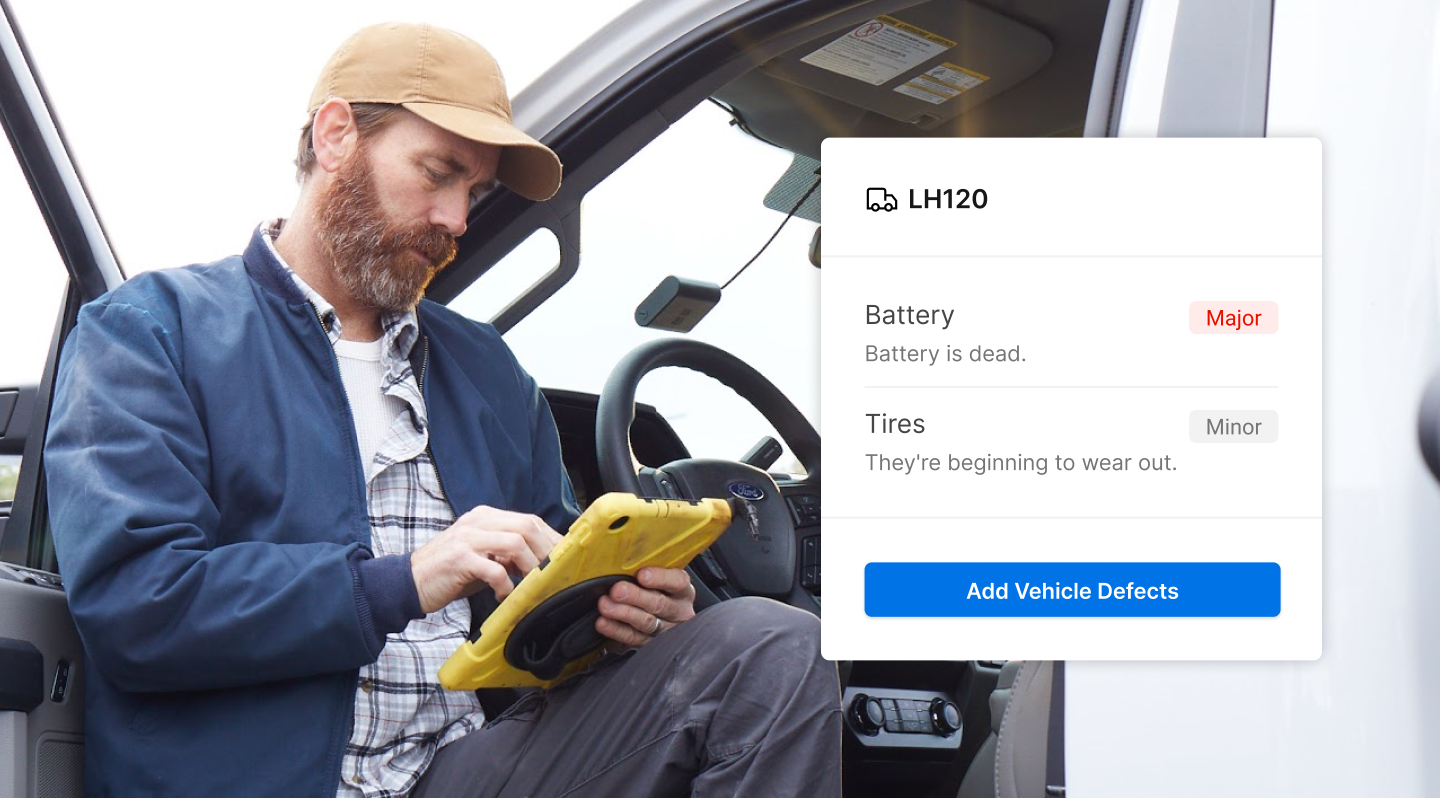
An eDVIR or electronic driver vehicle inspection report allows you to record, compile, and store pre-trip and post-trip information on electronic devices such as computers, smartphones, and tablets. This helps motor carriers and fleets to have a centralized record of inspection history, allowing authorized users to monitor progress, pull reports quickly, and promptly address driver, vehicle, or equipment issues.

Using an eDVIR, you can get out on the road faster with the convenience and accuracy of using a smartphone or tablet to record your data while ensuring your vehicle is safe for operations. Drivers can even take and upload photos to record details and communicate with fleet supervisors for quick troubleshooting. 

Making pre-trip inspection checklists easier

CDL pre-trip inspection checklists help systemize the driver’s check of their vehicle before going out on the road. This enhances driver safety and can help reduce accidents. Consistently inspecting fleet vehicles also helps simplify fleet maintenance and avoids failed DOT inspections and reduced CSA scores. 

Pre-trip checks are part of the day to day for drivers. Motive’s customizable eDVIR technology simplifies the reporting. Drivers can assess vehicle parts against a built-in checklist in the Motive Driver app, indicate the severity of the issue, and upload photos. Fleet managers get pre-trip inspection reports in real time. Plus, the technology provides advanced reports to help managers analyze health and maintenance trends for all fleet vehicles. 

Ensure smooth fleet operations with Motive’s fleet safety software. Learn more today. Contact us to request a free demo. 

Want to know more about commercial vehicle driving safety? Check out these tips.